
It is a pity I did not get them exactly vertical but the beauty of these labels is you can easily do them again. The two columns of print are very handy, especially when the left and right connectors have different functions.
Another job is deciding on a colour scheme for all the various knobs and fitting them all. Although this is only a 4 into 2 mixer, it has 60 knobs! I decided to select colours for each of the three bands of the EQs, for the pan controls, the AUX sends and the main gain switch. Here is the result:
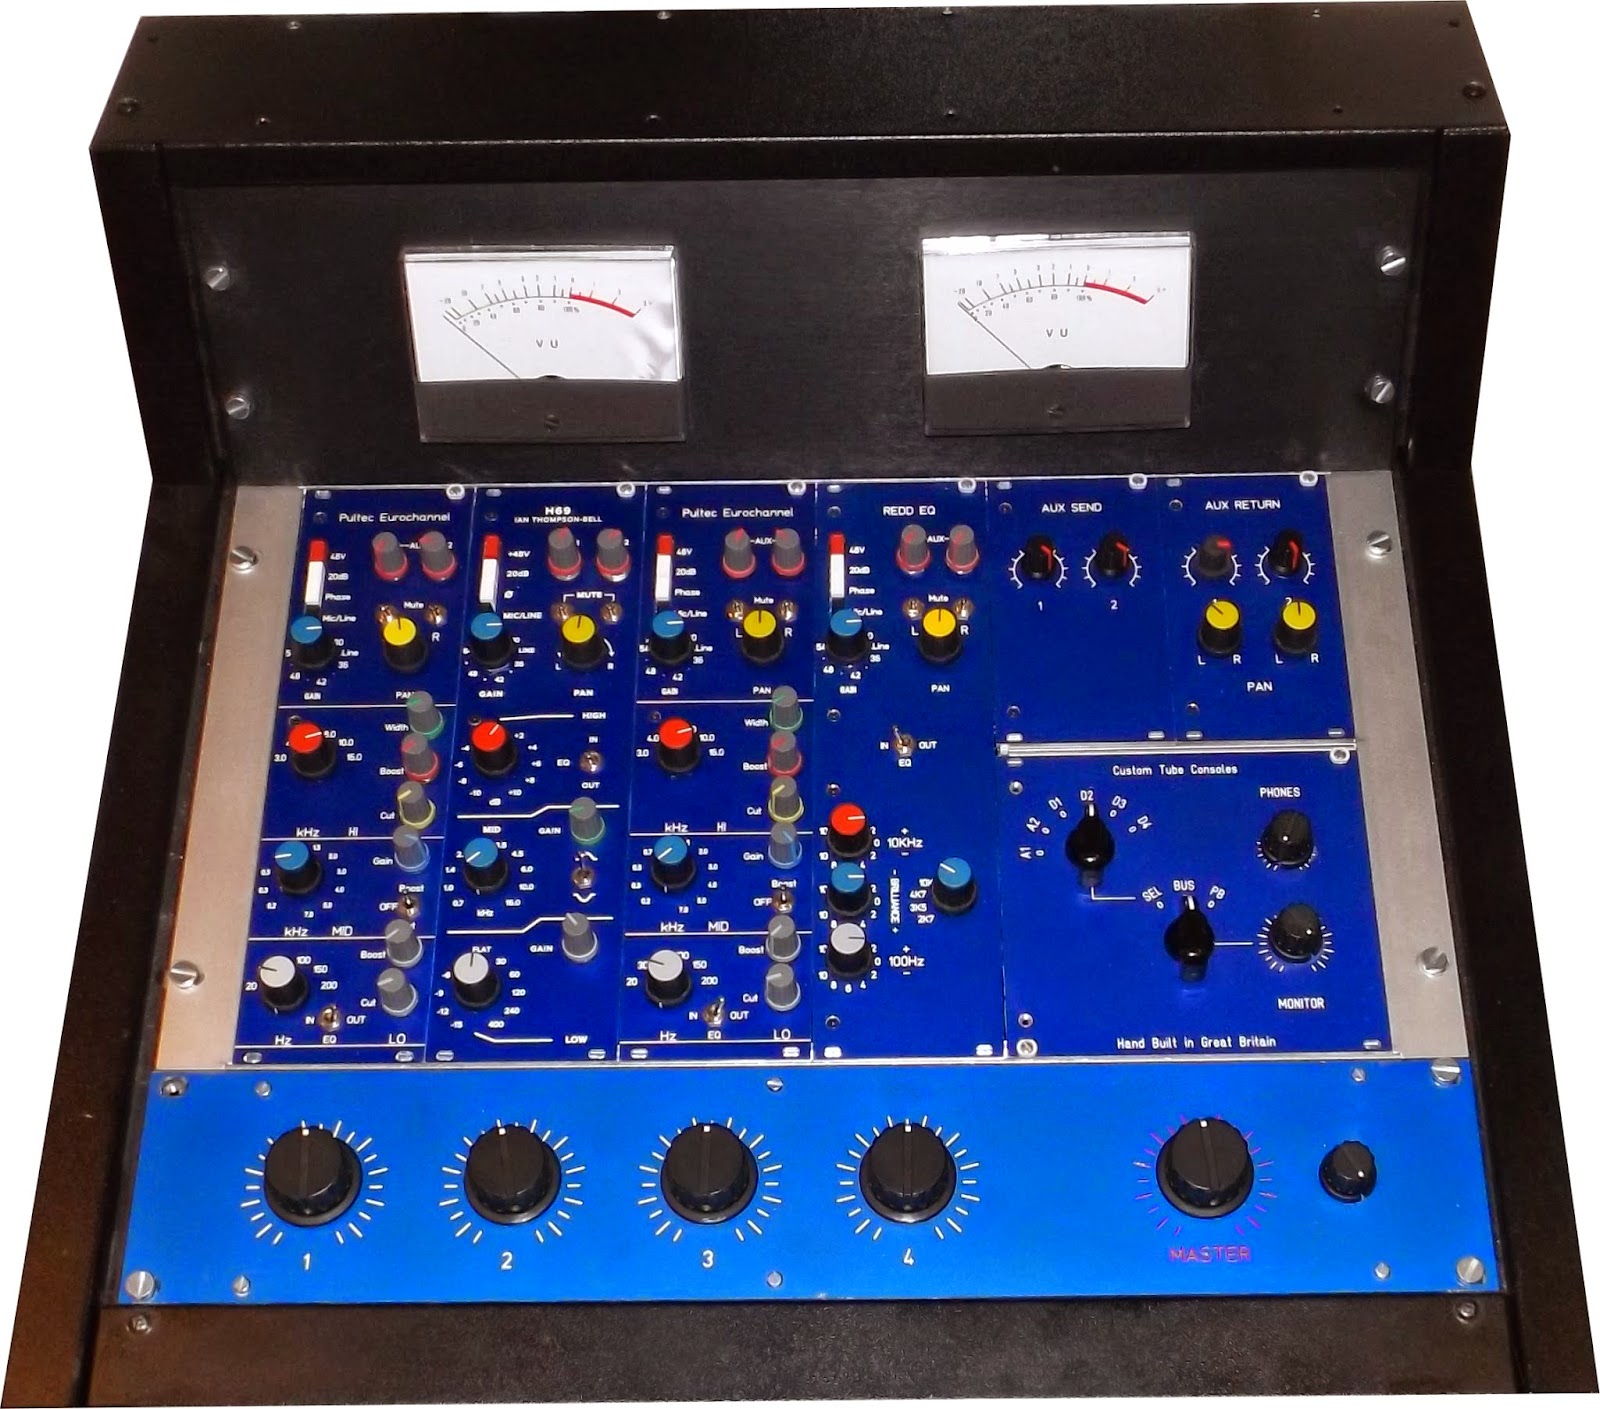
As you can see I picked yellow for the pan controls, red for the high EQ controls, blue for the mid and grey for the low. The AUX send and returns are red, the channel gain is blue and all the faders and monitor controls are black.
The next job was meter illumination. The meters I fitted have lamps built in. Fortunately they need a 12V supply so I just hooked them up as an additional load to the heater supply. Unfortunately, the lamps in one of them did not work so I had to change the meter - at some point I may take the non working meter apart and fix the lamps.
Now I need to let everyone in an a little secret. About a year ago I was approached by a guy in Canada about building him a custom four channel mixer. I told him about this mixer and he decided to buy it if I would add some specific mods for him. This I agreed to do. One of the mods was the unbalanced inserts after the mic pre and pre the fader and EQ. Another modification was the addition of a trim control on the main bus outputs. The idea here is to allow the bus amplifiers to be driven harder so as to produce more 'tube tone'. The trim control is a simple fixed range level pot using the 'Neve trick' to allow a single pot to alter the level on a transformer balanced output. I used a twin 1K pot to allow both left and right outputs to be altered together. A series resistor in the cold leg limits the pot range to about 12dB. With a nominal +4dBu output, this means the bus amp can be forced to output up to 12dB higher i.e at +16dBu. Since the output transformer has a 2:1 ratio, this means the output stage actually runs as high as +22dBu which will cause the amplifier to produce a small amount of 2nd and 3rd harmonic distortion. even at this level, the amplifier has plenty of headroom left so distortion will increase with level for quite a way before clipping occurs.
And of course, now I have sold the mixer, there was one more job to do - write the user manual including how to fit all the tubes and get it going once it had arrived. I am pleased to say it took only five days to reach Canada, it arrived all in one piece and, apart from one cable that came loose from its connector and at tube that needed to be wiggled in its socket to stop some scratchiness, the mixer seems to be working fine.